Installing solar panels on your property is a smart way to harness renewable energy, reduce your carbon footprint, and lower your electricity bills. However, the process can seem overwhelming if you’re unfamiliar with how solar panel installations work. In this guide, we’ll walk you through the step-by-step process of solar panel installation, from the initial consultation to the final inspection.
1. Initial Consultation and Assessment
The first step in the solar panel installation process is the consultation and assessment phase. During this stage, you’ll meet with a professional solar installer who will evaluate your property’s suitability for solar energy. Here’s what happens during this phase:
- Site Survey: The installer will conduct a site survey to assess the amount of sunlight your property receives. They will also check for any obstructions like trees, tall buildings, or roof features that could affect solar panel efficiency.
- Roof Condition Evaluation: A professional will assess the condition of your roof to ensure it can handle the weight of the solar panels. If your roof is old or damaged, repairs or replacements may be necessary before installation.
- Energy Needs Assessment: The installer will analyze your energy consumption and determine the number of solar panels needed to meet your needs. They will consider factors like the size of your home, your monthly electricity usage, and your location.
- Feasibility Check: The installer will check whether your property is a good candidate for solar panels based on factors like roof orientation, roof angle, and local weather conditions.
This phase may include providing you with a quote and explaining financing options, including tax incentives or rebates.
2. System Design and Proposal
After the site survey is completed, the solar company will design a solar system tailored to your needs. During this phase, the following steps are typically involved:
- Designing the System: Based on your roof’s size and layout, the installer will create a design for your solar panel system. This includes determining the number of panels, their placement, and the type of inverter that will be used to convert solar energy into electricity.
- System Specifications: The company will provide you with detailed specifications, including panel brands, the inverter type, and the expected energy production of the system. The proposal will also outline the cost of the installation and any available incentives.
- Permit Applications: Before installation begins, the installer will submit applications for the necessary permits. These permits typically include building and electrical permits. The local government may need to approve the design and ensure the system meets safety and zoning regulations.
The solar company may also apply for utility interconnection permits to ensure that your system is properly connected to the grid.
3. Roof Preparation and Mounting System Installation
Once all permits are approved, the next step is to prepare your roof for the solar panels. This stage involves setting up the mounting system that will hold the panels in place. Here’s what to expect:
- Roof Preparation: If there are any necessary roof repairs (e.g., fixing leaks or replacing shingles), this will be done before installation starts. A strong and stable roof is essential for safely mounting the solar panels.
- Mounting System Installation: The installer will attach the mounting system to your roof. The mounting system serves as the foundation for your solar panels, ensuring they are securely anchored. Depending on your roof type, the mounting system may involve racking or rails, which are designed to hold the panels at the optimal angle to capture sunlight.
- Weatherproofing: The mounting system is designed to be weather-resistant, ensuring that the panels remain securely in place regardless of weather conditions. Installers will seal all roof penetrations to prevent leaks.
This step typically takes one or two days to complete, depending on the size of the system.
4. Panel Installation
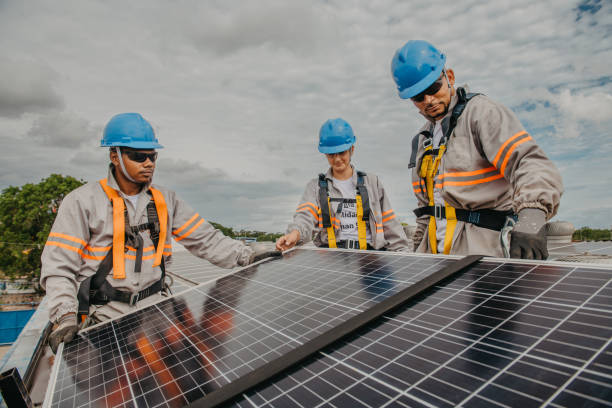
After the mounting system is in place, the solar panels will be installed. This is the step where you’ll start to see your solar system take shape. Here’s what happens:
- Panel Placement: The solar panels are carefully placed onto the mounting system. Panels are connected to the racking system in a way that maximizes sunlight exposure and efficiency.
- Wiring: The panels are wired together to form a solar array. Each panel is connected to a central inverter, which converts the direct current (DC) electricity produced by the panels into alternating current (AC) electricity that can be used in your home.
- Inverter Installation: The inverter is typically mounted on a wall, usually in a garage or utility room, where it can be easily accessed for maintenance. The inverter converts the energy produced by the panels into electricity that can be used to power your appliances and devices.
This process is often completed in one to two days, depending on the system’s size.
5. Electrical Wiring and Connection to the Grid
Once the solar panels are installed, the next step is to connect the system to your home’s electrical system and the utility grid. During this phase, the following occurs:
- Wiring the Panels to the Inverter: The panels are connected to the inverter, and the inverter is connected to your electrical panel. The system is configured to ensure that energy flows efficiently from the panels to the inverter, and then to your electrical system.
- Connecting to the Utility Grid: If you are participating in net metering (where excess energy generated by your solar panels is sent back to the grid), your solar system will be connected to the utility grid. The utility company will install a bi-directional meter to track the energy you consume and the energy you send back to the grid.
- Safety Checks: The system undergoes safety inspections to ensure it is compliant with all electrical codes. Electrical wiring and connections are double-checked to minimize the risk of faults.
This step often takes a day or two to complete, depending on the complexity of your home’s electrical setup.
6. Final Inspection and Approval
Once the system is connected, it must undergo a final inspection to ensure that it meets local building codes and safety standards. This inspection will typically be performed by a local government official or a certified third-party inspector.
- Local Inspection: A licensed inspector will examine the system to ensure it has been installed according to local regulations and safety standards.
- Utility Company Approval: If you are connecting to the grid, the utility company will inspect the system before they allow it to start sending power back to the grid. This is an important step to ensure the system is safe and operates properly.
Once the inspection is passed, the system is officially approved for operation.
7. System Activation and Monitoring Setup
After your solar panel system is approved, the final step is activating the system and setting up monitoring. Here’s what you can expect:
- System Activation: The solar installer will turn on the system and ensure everything is working correctly. This includes checking that the inverter is producing power and that all components are functioning as expected.
- Monitoring Setup: Many solar systems include a monitoring system that tracks the energy production and performance of your panels. The installer will help you set up an app or website to monitor your system’s performance in real-time, allowing you to track your energy savings and efficiency.
8. Ongoing Maintenance and Support
Once your system is up and running, ongoing maintenance is relatively low. However, it’s still important to have occasional check-ups to ensure the system continues to function efficiently. Solar companies typically offer maintenance services, including:
- Panel Cleaning: Periodically cleaning the panels to remove dust, dirt, or debris that could reduce efficiency.
- Performance Checks: Checking the inverter and electrical connections to ensure optimal performance.
Conclusion
The process of installing solar panels involves several detailed steps, from the initial consultation to the final inspection and activation. By understanding the entire process, you can better prepare for the installation and ensure that everything runs smoothly. Whether you’re looking to reduce your energy bills or contribute to a cleaner environment, investing in solar energy is a wise decision that can bring long-term benefits to your home or business.