


Introduction:
When it comes to home renovation projects, removing old wallpaper is often a necessary step in refreshing the look of a room. However, tackling this task can seem daunting, especially if you’ve never done it before. In this comprehensive guide, we’ll provide you with the exact “how to remove old wallpaper” throughout, offering a step-by-step approach and expert tips to help you successfully remove old wallpaper and prepare your walls for a fresh new look.
Gather Your Supplies:
Before you begin the wallpaper removal process, it’s essential to gather all the necessary supplies. Here’s what you’ll need:
- Wallpaper scorer or perforating tool
- Wallpaper stripping solution or remover
- Spray bottle or sponge
- Putty knife or scraper
- Drop cloths or plastic sheeting
- Bucket or container for water
- Wallpaper removal steamer (optional)
- Safety goggles and gloves
Prepare the Room:
Start by preparing the room for wallpaper removal. Clear the area of furniture, wall decor, and other items to create a clean and open workspace. Cover the floors with drop cloths or plastic sheeting to protect them from water and debris. Remove any electrical outlet covers and switch plates, and turn off the power to the room as a safety precaution.
Score the Wallpaper:
Using a wallpaper scorer or perforating tool, carefully score the surface of the wallpaper. This will create small holes in the wallpaper, allowing the stripping solution to penetrate and loosen the adhesive underneath. Be sure to work in small sections, scoring the wallpaper evenly to ensure thorough coverage.
Apply the Stripping Solution:
Next, apply the wallpaper stripping solution or remover to the scored wallpaper. You can use a spray bottle to mist the solution onto the wallpaper or apply it with a sponge. Allow the solution to soak into the wallpaper for the recommended amount of time, typically 10 to 15 minutes, to soften the adhesive.
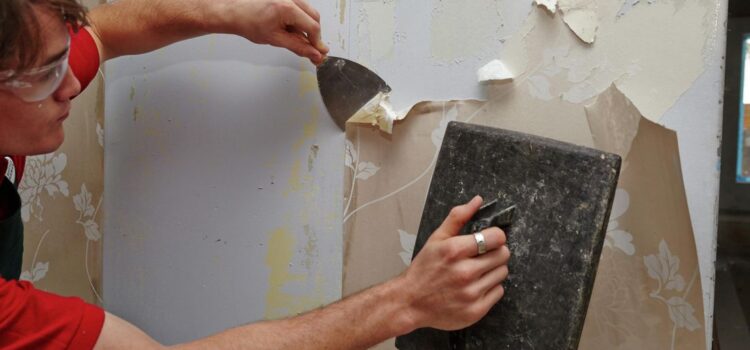
Start Stripping:
Once the wallpaper has had time to soak, begin stripping it from the wall. Use a putty knife or scraper to gently lift the edges of the wallpaper, starting at the top of the wall and working your way down. Take care not to damage the underlying drywall or plaster as you remove the wallpaper. If the wallpaper is stubborn or resistant, you may need to reapply the stripping solution and let it soak for additional time.
Remove Residual Adhesive:
After removing the wallpaper, you may notice residual adhesive or backing left on the wall. To remove this residue, dampen a sponge or cloth with warm water and gently scrub the wall surface. Alternatively, you can use a commercial adhesive remover or a mixture of water and vinegar to help dissolve the adhesive.
Clean and Dry the Walls:
Once all the wallpaper and adhesive residue have been removed, thoroughly clean the walls with a mild detergent solution to remove any remaining residue or dirt. Rinse the walls with clean water and allow them to dry completely before proceeding with any further wall treatments or paint.
Final Steps:
Inspect the walls for any imperfections or damage, such as holes or cracks, and patch them with spackle or joint compound as needed. Sand the patched areas smooth once they’re dry, and apply a coat of primer to the walls to ensure proper adhesion of paint or new wallpaper. Once the primer is dry, your walls will be ready for whatever new finish you have planned.
Conclusion:
Removing old wallpaper can be a challenging task, but with the right tools, techniques, and patience, you can achieve professional-quality results. By following the step-by-step guide outlined in this article and utilizing the exact keyword “how to remove old wallpaper,” you’ll be well-equipped to tackle this home improvement project with confidence. Whether you’re preparing to repaint, re-wallpaper, or simply refresh your walls, taking the time to properly remove old wallpaper will ensure a smooth and successful outcome, leaving your walls looking fresh and ready for whatever comes next.
Visit Home Pick https://home-pick.co.uk/
Comments
Things to Look for When Choosing Study Abroad Consultants in Kerala